inoue

TRY
【WordPress】GA4連携の人気記事ランキング機能を自作プラグイン化してみた

目次
AMP Stories(ストーリーズ)は、Instagramのストーリーズのようなビジュアル・操作感で、タップ操作で次々にページを切り替えて軽快に閲覧できるAMPページです。
画像、動画、音声などを使ってフルスクリーンで情報を見せることが可能なので没入感もあり、ビジュアル重視のコンテンツを発信するには最適だと思います。
またWebページですが、AMPを用いているため非常に軽いです。
Instagramのストーリーズと違うのは、
通常のAMPページと違うのは、
おおまかにこんなところ。
画像や動画などのビジュアルをメインにペラペラとカードをめくるように見せられるので、商品の紹介やイベントのパンフレットなどに使えそうです。最後のページにまとめてリンクも貼れるので、上手く使えばコンバージョンにも繋がるかも!?
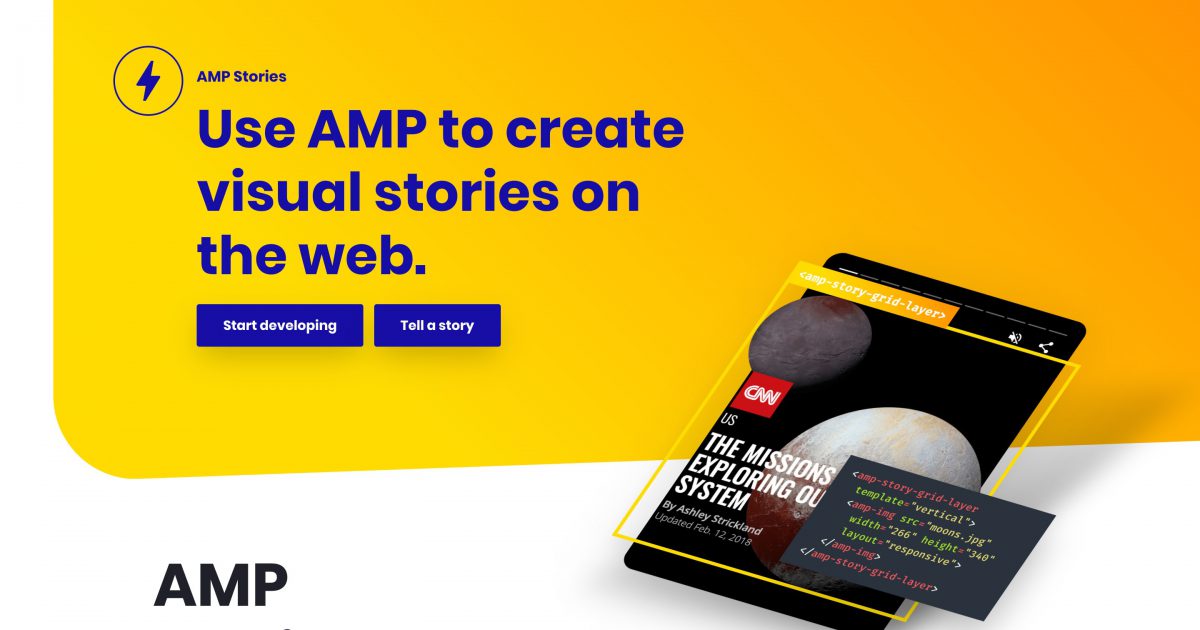
そんなAMPストーリーズですが、公式ドキュメントでhtmlの雛形が配布されているので作るのは非常に簡単です。
Create your first AMP Story
https://amp.dev/ja/documentation/guides-and-tutorials/start/visual_story/?format=stories
簡単なhtmlと画像しか必要ないので特に迷うこともなく作れるのですが、WordPressで運用しているサイトだとやはり管理画面で必要事項を入力してもっと簡単に作りたいです。 phpを使って動的に生成する方法を自分なりに考えたので今回はそれをメモしておきます。
実際に作ったものはこちら。
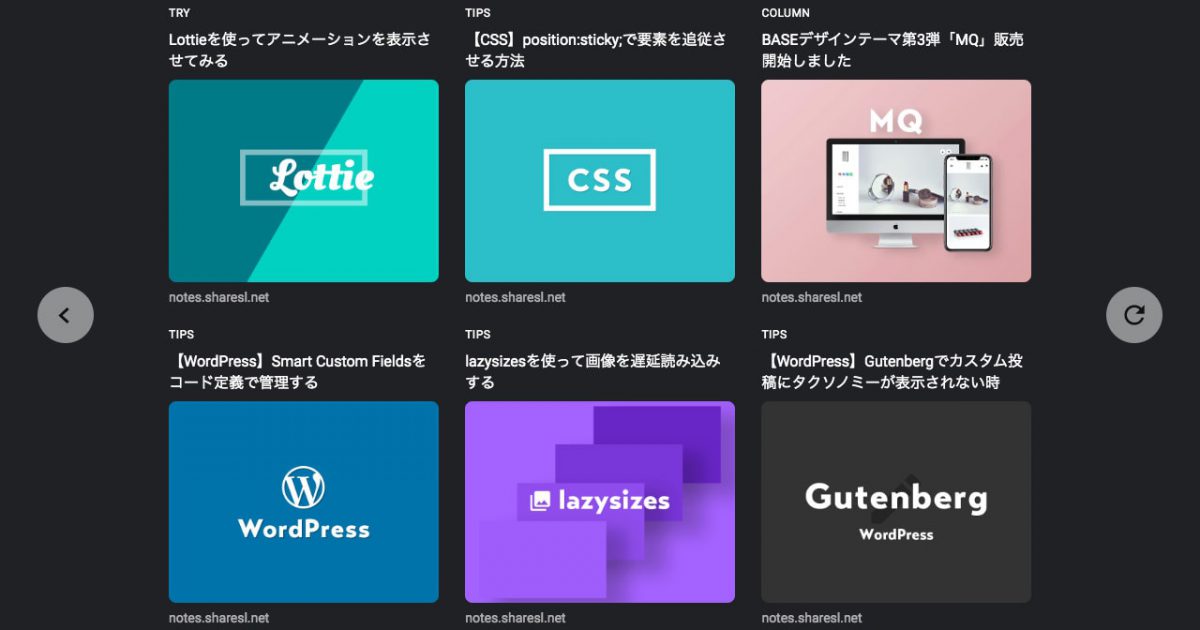
どんなAMPストーリーズを作ろうかと考えたのですが、とりあえず人気記事ランキングを作ってみました。
ただ人気記事に関してはこのサイトのプラグインに依存しているので、この記事ではどの環境でも対応できそうな新着記事一覧を作ってみます。
AMP Stories + WordPressで作った新着記事リストのDEMO
今回はざっくり以下の作業が必要になります。
では1つずつ見ていきます。
AMP Storiesから落としてきた公式の雛形をWordPress化します。
ひとまず適当なカスタム投稿タイプを準備して投稿テンプレートを作り、そこに雛形から必要な部分をコピペします。
<!doctype html>
<html ⚡>
<head>
  <meta charset="utf-8">
  <meta name="robots" content="noindex,nofollow">
  <title><?php the_title()?></title>
  <link rel="canonical" href="pets.html">
  <meta name="viewport" content="width=device-width,minimum-scale=1,initial-scale=1">
  <style amp-boilerplate>body{-webkit-animation:-amp-start 8s steps(1,end) 0s 1 normal both;-moz-animation:-amp-start 8s steps(1,end) 0s 1 normal both;-ms-animation:-amp-start 8s steps(1,end) 0s 1 normal both;animation:-amp-start 8s steps(1,end) 0s 1 normal both}@-webkit-keyframes -amp-start{from{visibility:hidden}to{visibility:visible}}@-moz-keyframes -amp-start{from{visibility:hidden}to{visibility:visible}}@-ms-keyframes -amp-start{from{visibility:hidden}to{visibility:visible}}@-o-keyframes -amp-start{from{visibility:hidden}to{visibility:visible}}@keyframes -amp-start{from{visibility:hidden}to{visibility:visible}}</style><noscript><style amp-boilerplate>body{-webkit-animation:none;-moz-animation:none;-ms-animation:none;animation:none}</style></noscript>
  <script async src="https://cdn.ampproject.org/v0.js"></script>
  <script async custom-element="amp-video"
  src="https://cdn.ampproject.org/v0/amp-video-0.1.js"></script>
  <script async custom-element="amp-story"
  src="https://cdn.ampproject.org/v0/amp-story-1.0.js"></script>
  <link href="https://fonts.googleapis.com/css?family=Oswald:200,300,400" rel="stylesheet">
  <style amp-custom>
    amp-story {
      font-family: 'Oswald',sans-serif;
      color: #fff;
    }
    amp-story-page {
      background-color: #000;
    }
    h1 {
      font-weight: bold;
      font-size: 2.875em;
      font-weight: normal;
      line-height: 1.174;
    }
    p {
      font-weight: normal;
      font-size: 1.3em;
      line-height: 1.5em;
      color: #fff;
    }
    q {
      font-weight: 300;
      font-size: 1.1em;
    }
    amp-story-grid-layer.bottom {
      align-content:end;
    }
    amp-story-grid-layer.noedge {
      padding: 0px;
    }
    amp-story-grid-layer.center-text {
      align-content: center;
    }
    .wrapper {
      display: grid;
      grid-template-columns: 50% 50%;
      grid-template-rows: 50% 50%;
    }
    .banner-text {
      text-align: center;
      background-color: #000;
      line-height: 2em;
    }
  </style>
</head>
<body>
  <!-- Cover page -->
  <amp-story standalone>
    <amp-story-page id="cover">
      <?php
      //アイキャッチ画像を取得する関数(独自関数なので調整してください)
      $eyecatch = get_eyecatch();
      if(!empty($eyecatch['src'])){
        ?>
        <amp-story-grid-layer template="fill">
          <amp-img src="<?php echo esc_url($eyecatch['src'])?>" width="<?php echo esc_attr($eyecatch['width'])?>" height="<?php echo esc_attr($eyecatch['height'])?>" layout="responsive"></amp-img>
        </amp-story-grid-layer>
        <?php
      }
      ?>
      <amp-story-grid-layer template="vertical" class="center-text">
        <h1><?php the_title()?></h1>
        <?php
        //抜粋を表示
        if(!empty($post->post_content)){
          ?>
          <p><?php the_excerpt()?></p>
          <?php
        }
        ?>
      </amp-story-grid-layer>
    </amp-story-page>

    <?php
    //新着記事 6記事
    $new_args = [
      'post_type'      => 'post',
      'posts_per_page' => 6,
      'post_status'    => 'publish',
      'orderby'        => 'date',
      'order'          => 'DESC',
      'no_found_rows'  => true
    ];
    $new_query = new WP_Query( $new_args );
    if ( $new_query->have_posts() ) :
      $i = 0;
      while ( $new_query->have_posts() ) :
        $new_query->the_post();
        ++$i;
        ?>
        <amp-story-page id="page-<?php echo esc_attr($i)?>">
          <?php
          //カスタムフィールドに設定したStories用の画像idを取得
          $image_id = get_post_meta($post->ID, 'cf_stories_image', true);
          if(!empty($image_id)){
            //画像idから画像情報を取得する関数(独自関数なので調整してください)
            $image = image_info_by($image_id);
            ?>
            <amp-story-grid-layer template="fill">
              <amp-img src="<?php echo esc_url($image['src'])?>" width="<?php echo esc_attr($image['width'])?>" height="<?php echo esc_attr($image['height'])?>" layout="responsive"></amp-img>
            </amp-story-grid-layer>
            <?php
          }
          else{
            ?>
            <amp-story-grid-layer template="fill">
              <amp-img src="<?php echo esc_url(get_theme_file_uri('assets/images/stories-sp.png'))?>" width="750" height="1280" layout="responsive"></amp-img>
            </amp-story-grid-layer>
            <?php
          }
          ?>
          <amp-story-grid-layer template="vertical">
            <h1><?php the_time('Y.m.d')?></h1>
          </amp-story-grid-layer>
          <amp-story-grid-layer template="vertical" class="bottom">
            <p animate-in="fly-in-bottom" animate-in-delay="0.2s"><?php the_title()?></p>
          </amp-story-grid-layer>
        </amp-story-page>
        <?php
      endwhile;
      wp_reset_postdata();
    endif;
    ?>
    <!-- Bookend -->
    <amp-story-bookend src="<?php echo esc_url(rest_url("custom/v0/stories/bookend/{$post->post_name}"))?>" layout="nodisplay"></amp-story-bookend>
  </amp-story>
</body>
</html>
ほとんど雛形のままですが、変更したポイントだけ細かく見ていきます。
タイトルタグやcanonicalなどはWordPressの関数で置きかえます。AMP Storiesのcanonicalに関してはAMPページと通常のページといったように分けることがないので、自身のURLを設定します。
このデモソースでは設定していませんが、OGPに関しては通常のWebページと同じように設定できるので、SNSでシェアする場合は設定しておいた方が良いでしょう。
CSSのカスタマイズに関しては通常のAMPと同じく<style amp-custom></style>内に直書きです。
おおまかにすると下記のような構造になります。
<body>
  <amp-story standalone>

    <amp-story-page id="page-1">
      <amp-story-grid-layer template="fill">
        <amp-img src="背景画像.png" width="720" height="1280" layout="responsive"></amp-img>
      </amp-story-grid-layer>
      <amp-story-grid-layer template="vertical">
        <h1>タイトル</h1>
      </amp-story-grid-layer>
      <amp-story-grid-layer template="vertical" class="bottom">
        <p>テキスト</p>
      </amp-story-grid-layer>
    </amp-story-page>

    <amp-story-page id="page-2">
      <amp-story-grid-layer template="fill">
        <amp-img src="背景画像.png" width="720" height="1280" layout="responsive"></amp-img>
      </amp-story-grid-layer>
      <amp-story-grid-layer template="vertical">
        <h1>タイトル</h1>
      </amp-story-grid-layer>
      <amp-story-grid-layer template="vertical" class="bottom">
        <p>テキスト</p>
      </amp-story-grid-layer>
    </amp-story-page>

    ・・・page3

    ・・・page4

    <!-- 最後のページにリンクやシェアボタンをつける設定をbookend.jsonとして読み込む -->
    <amp-story-bookend src="bookend.json" layout="nodisplay"></amp-story-bookend>
  </amp-story>
</body>bodyの直下にamp-storyを置いて、その下にamp-pageとしてパラパラめくるページを1つずつ作っていく感じです。
ここにはけっこう厳しいルールがあって、ここに書いてある以外の他のタグはほとんど全然使えないですし、amp-storyをdivで囲うみたいなこともできません。 どのタグの直下にどのタグを置けるか厳密に決まっているので、雛形からほとんどいじる必要がないと思います。
構造についてもっと知りたい場合は公式ドキュメントに画像付きで説明があるのでこちらを参考にするとわかりやすいです。
AMP ストーリーのパーツについて
https://amp.dev/ja/documentation/guides-and-tutorials/start/visual_story/parts_of_story/?format=stories
bookend.jsonについては次で詳しくまとめます。
※2021/07/20追記
ブックエンドはamp-story-bookendタグが廃止されたようで表示されなくなりました。
以降でブックエンドをWPから動的に生成する方法について書いていますが、すでに使えない方法となっています。
AMPストーリーズのページにはリンクやシェアボタンをつけることができません。 ただ最後にリンク集やボタンをまとめて表示できる「ブックエンド」を外部の設定ファイル(json)から読み込んで追加できる機能があります。
{
  "bookendVersion": "v1.0",
  "shareProviders": [
    "facebook",
    "twitter",
    "email"
  ],
  "components": [
    {
      "type": "heading",
      "text": "More to read"
    },
    {
      "type": "small",
      "title": "Learn about cats",
      "url": "https://wikipedia.org/wiki/Cat",
      "image": "../stories/assets/bookend_cats.jpg"
    },
    {
      "type": "landscape",
      "title": "Learn about border collies",
      "url": "https://wikipedia.org/wiki/Border_Collie",
      "image": "assets/bookend_dogs.jpg",
      "category": "Dogs"
    },
    {
      "type": "portrait",
      "title": "Learn about macaws",
      "url": "https://wikipedia.org/wiki/Macaw",
      "image": "assets/bookend_birds.jpg",
      "category": "birds"
    },
    {
      "type": "cta-link",
      "links": [
        {
          "text": "Learn more",
          "url": "https://www.ampproject.org/stories/"
        }
      ]
    }
  ]
}
雛形に入っているのはこれですね。これを設定すると下記のようなリンクと画像がストーリーの最後に追加されます。

このブックエンドはなくても動作するのですが、AMPストーリーズにはページにリンクが貼れないので、こちらはほぼ必須の設定ファイルになります。
jsonの設定についての基本事項は下記からご確認ください。
ブックエンドを作成する
https://amp.dev/ja/documentation/guides-and-tutorials/start/visual_story/create_bookend/?format=stories
1点だけ注意点として、facebookのシェアボタンを設置する場合はアプリIDが必要になります。
"shareProviders": [
  {
    "provider" : "facebook",
    "app_id"   : "アプリID"
  },
  "twitter",
  "email"
]
ここまでは雛形の設定を使ったブックエンドの基本についてですが、雛形は静的なjsonファイルなので、WordPressで作るとなると毎回ちまちま編集してアップロードするのがなんか手間です。 もっと楽したい。笑
そこで今回はWP REST APIを使って動的に生成するようにしてみます。
<?php
//エンドポイントを追加する
function add_custom_endpoint()
{
  //AMP Stories bookend用
  register_rest_route(
    'custom/v0',
    '/stories/bookend/(?P<slug>[\w-]+)',
    [
      'methods'  =>  WP_REST_Server::READABLE,
      'callback' => 'fetch_stories_bookend',
      'args'     => [
        'slug' => [
          'validate_callback' => function ($param, $request, $key) {
            return is_string($param);
          },
          'sanitize_callback' => function ($param) {
            return esc_attr($param);
          }
        ]
      ]
    ]
  );
}

/*
* コールバック
* @param {String} param 取得したパラメータ
* return {String} bookend.json
*/
function fetch_stories_bookend($param)
{
  $json = [];

  //パラメータから記事スラッグを取得
  $slug = $param['slug'];
  if(empty($slug)){
    return $json;
  }

  //スラッグから記事を取得(ここではdemo投稿タイプを指定)
  $post = get_page_by_path($slug, OBJECT, 'demo');
  if(empty($post)){
    return $json;
  }

  //記事ID
  $post_id = $post->ID;
  if (empty($post_id)) {
    return $json;
  }

  //今回は雛形があるのでバッファリングします
  ob_start();
  ?>
  {
    "bookendVersion" : "v1.0",
    "shareProviders" : [
    {
      "provider" : "facebook",
      "app_id"   : "アプリID"
    },
    "twitter",
    "line",
    "email",
    "sms"
    ],
    "components" : [
    {
      "type" : "heading",
      "text" : "Related Links"
    },
    <?php
    //新着記事
    $new_args = [
      'post_type'      => 'post',
      'posts_per_page' => 6,
      'post_status'    => 'publish',
      'orderby'        => 'date',
      'order'          => 'DESC',
      'no_found_rows'  => true
    ];
    $new_query = new WP_Query( $new_args );
    if ( $new_query->have_posts() ) :
      while ( $new_query->have_posts() ) :
        $new_query->the_post();
        global $post;
        //カスタムフィールドに設定したStories用の画像idを取得
        $image_id  = get_post_meta($post->ID, 'cf_stories_image', true);
         //画像idから画像情報を取得する関数(独自関数なので調整してください)
        $image     = image_info_by($image_id);
        $image_url = $image['src'];
        //記事カテゴリ
        $cat       = get_the_category( $post->ID);
        $category  = $cat[0]->cat_name;
        ?>
        {
          "type"     : "landscape",
          "title"    : "<?php the_title()?>",
          "url"      : "<?php the_permalink()?>",
          "image"    : "<?php echo esc_url($image_url)?>",
          "category" : "<?php echo esc_attr($category)?>"
        },
        <?php
      endwhile;
      wp_reset_postdata();
    endif;
    ?>
    {
      "type"  : "cta-link",
      "links" : [
      {
        "text" : "more articles",
        "url"  : "<?php echo esc_url(home_url('/'))?>"
      }
      ]
    }
    ]
  }
  <?php
  //出力を変数にまとめる
  $json = ob_get_contents();
  ob_end_clean();

  //文字列を連想配列にして返却
  return json_decode($json, true);
}
?>
これを設定して出来上がったブックエンドがこちら。
いい感じになりました。
新着記事や人気記事だけしか表示できないとあまり意味がないので、カスタムフィールドでページやブックエンドを追加できるようにしてみます。
Smart Custom Fieldsは無料でカスタムフィールドのループ機能が使えるのでこれを使います。 Custom Field SuiteやAdvanced Custom Fieldsなどでも代用が効きますが、各プラグインの使い方に関しては今回は省略します。
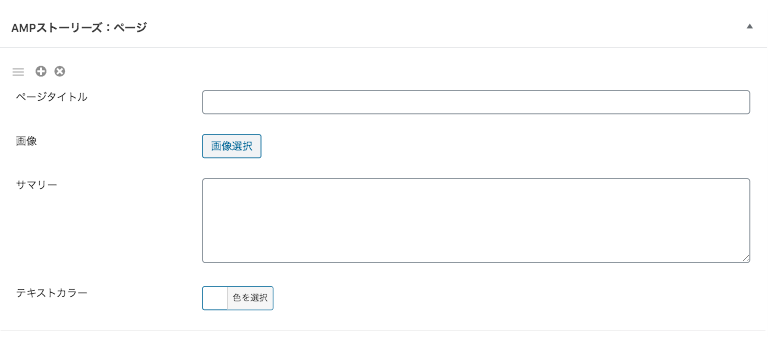
ページ用に「タイトル」「画像」「サマリー」「テキストカラー」のカスタムフィールドを用意します。
ブックエンド用には「タイトル」「表示タイプ」「URL」「画像」「カテゴリ」のカスタムフィールドを用意。
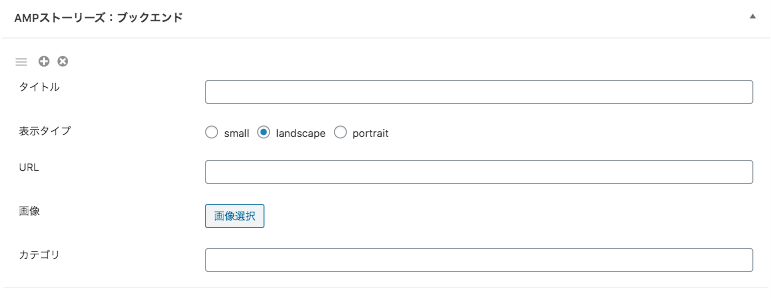
AMPストーリーズは1ページに使う情報が少ないのでこんな感じで2種類のフィールドグループがあればWordPressから簡単に生成できます。 動画や音声を使う場合はグループにさらにフィールドを追加します。
ではこのカスタムフィールドを使ってテンプレートを調整します。
先ほど新着記事で使ったテンプレートを書き換えます。 まずCSSを<style amp-custom></style>タグ内の最下に追記します。
<style amp-custom>
  <?php
  //AMPページフィールドグループを取得(Smart Custom Fieldsの場合)
  $pages = SCF::get('cf_ampstories_page_group');
  $count = 0;
  //ループでテキストカラーのCSSを当てる
  foreach ((array)$pages as $page){
    $textcolor  = $page['cf_ampstories_page_textcolor'];
    ++$count;
    //テキストカラーを変更
    ?>
    #custom-<?php echo $count?>,
    #custom-<?php echo $count?> p
    {
      color: <?php echo esc_attr($textcolor)?>;
    }
    <?php
  }
  ?>
</style>
これは何をしているかというと、設定する画像によってテキストカラーを変更しないと文字の視認性が保てないので「テキストカラー」フィールドの情報をCSSに追加しています。
次にamp-pageを追加します。先ほどの新着情報のループの下に追記します。
<?php
$i = 0;
//ループでAMPページを生成
foreach ((array)$pages as $page):
  ++$i;
  //タイトル・画像情報・サマリーを取得
  $title    = $page['cf_ampstories_page_title'];
  $image    = image_info_by($page['cf_ampstories_page_image']);
  $summary  = $page['cf_ampstories_page_summary'];
  ?>
  <amp-story-page id="custom-<?php echo esc_attr($i)?>">
    <?php
    if(!empty($image['src'])){
      ?>
      <amp-story-grid-layer template="fill">
        <amp-img src="<?php echo esc_url($image['src'])?>" width="<?php echo esc_attr($image['width'])?>" height="<?php echo esc_attr($image['height'])?>" layout="responsive"></amp-img>
      </amp-story-grid-layer>
      <?php
    }
    ?>
    <?php
    if(!empty($title)){
      ?>
      <amp-story-grid-layer template="vertical">
        <h1><?php echo esc_html($title)?></h1>
      </amp-story-grid-layer>
      <?php
    }
    ?>
    <?php
    if(!empty($summary)){
      ?>
      <amp-story-grid-layer template="vertical" class="bottom">
        <p animate-in="fly-in-bottom" animate-in-delay="0.2s"><?php echo esc_html($summary)?></p>
      </amp-story-grid-layer>
      <?php
    }
    ?>
  </amp-story-page>
  <?php
endforeach;
?>
単純に新着情報の部分をカスタムフィールドのループ処理に変更して追記しただけです。 普段からWordPressをカスタマイズしている人はわかると思います。
次にブックエンドのAPI。新着情報のループ部分の下に追記します。
<?php
//ブックエンドフィールドグループを取得
$bookend = SCF::get('cf_ampstories_bookend_group', $post_id);
//各項目の空判定
$is_bookend = !empty($bookend) && !empty(get_post_meta($post_id, 'cf_ampstories_bookend_type', true)) && !empty(get_post_meta($post_id, 'cf_ampstories_bookend_title', true)) && !empty(get_post_meta($post_id, 'cf_ampstories_bookend_url', true));
if($is_bookend){
  foreach ((array)$bookend as $b):
    $type  = $b['cf_ampstories_bookend_type'];
    $title = $b['cf_ampstories_bookend_title'];
    $url   = $b['cf_ampstories_bookend_url'];
    //画像idから画像情報を取得する関数(独自関数なので調整してください)
    $image     = image_info_by($image_id);
    $image_url = $image['src'];
    $category = $b['cf_ampstories_bookend_category'];
    ?>
    {
      "type"     : "<?php echo esc_attr($type)?>",
      "title"    : "<?php echo esc_attr($title)?>",
      "url"      : "<?php echo esc_url($url)?>",
      "image"    : "<?php echo esc_url($image_url)?>",
      "category" : "<?php echo esc_attr($category)?>"
    },
    <?php
  endforeach;
}
?>
これでブックエンドをWordPressのカスタムフィールドから自由に追加・変更できるようになりました。
今回はAMP StoriesをWordPressで生成する方法について書きました。
ただ人気記事ランキングや新着記事などはAMPとしてキャッシュされてしまったら意味ないので実用性はないですね。 ただなんか作ってみたかっただけ。笑
実際作ってみると予想以上に簡単ですし、動画と組み合わせたイベントのプロモーション、ECサイトの商品紹介、インフォグラフィックを使った操作方法の紹介などはけっこう相性が良さそうに思いました。 もう少し改良すれば、今後の制作で新しい提案として使い所がありそうです!
ご指摘・ご意見はTwitterからお願いします。

【WordPress】GA4連携の人気記事ランキング機能を自作プラグイン化してみた
![netlify UPDATE BUILD IMAGE [ビルドイメージの更新]](https://notes.sharesl.net/wp-content/uploads/2022/09/netlify-update-build-image-660x440.jpg)
【netlify】ビルドイメージを更新 [ Ubuntu Xenial 16.04 → Ubuntu Focal 20.04 ]

スクリーンショットのAPI「screendot」を使ってみた

DartSassがなかなか辛かったのでGulpを修正してみた
![AudioVisualizer [ howler.js + SVG ]](https://notes.sharesl.net/wp-content/uploads/2021/07/svg-audiovisualizer-660x440.jpg)
【howler.js】ストリーミング音源からオーディオビジュアライザーを作る

Simple GA Ranking[ver2.1.6]が表示されないので調べてみた


![AVIF [ gulpでjpg・pngからAVIF画像を生成 ]](https://notes.sharesl.net/wp-content/uploads/2022/09/avif-660x440.jpg)
![MutationObserverでDOMを監視[PhotoSwipe(v5)+Swiper(v8)連携]](https://notes.sharesl.net/wp-content/uploads/2022/08/mutationobserver-660x440.jpg)