inoue

TRY
【WordPress】GA4連携の人気記事ランキング機能を自作プラグイン化してみた

目次
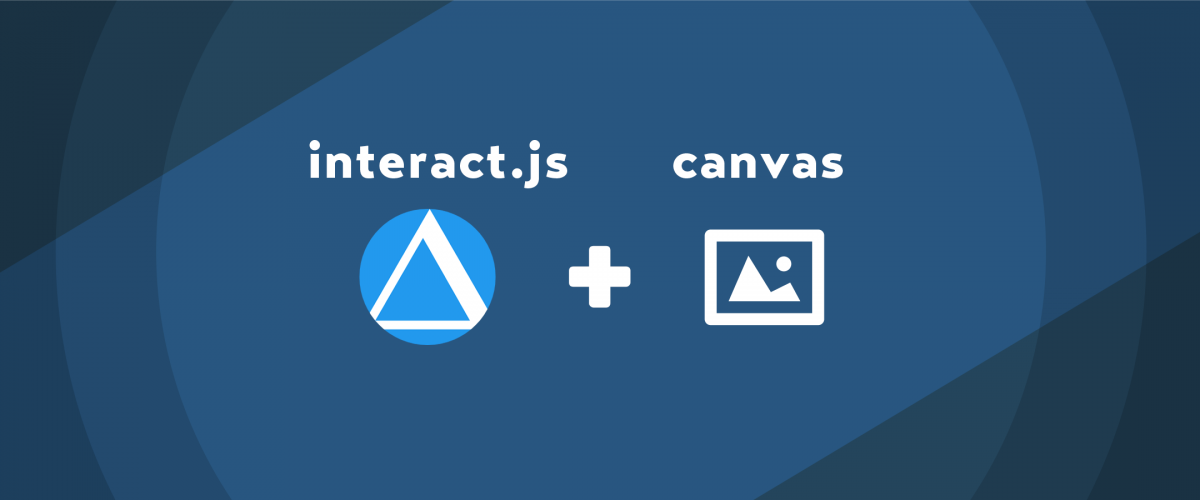
一つ前の記事で、interact.jsを使ってhtmlで作った図形を動かす方法を紹介しました。
記事を書いといてなんですが、あのサンプルを作ったところで特に使い道がないですね。笑
そのため今回は簡単なWebアプリケーションに使える応用編としてcanvasと組み合わせて画像の位置移動ができるようにしてみようと思います。
今回新しく作ってみたDEMOはこちら。
interact.js - canvas上で画像を動かすDEMO
「画像をアップロード」から好きな画像をアップロードしてグリグリ動かせるようにしました。 回転や拡大縮小はなしで位置移動するだけのシンプルなものです。 iOSでしか確認できてませんが、スマホでも見れます。
まずはhtml上にcanvasを用意します。
ついでなので画像をアップロードできるようにしてみます。canvasタグと<input type="file">タグを使います。
<body>
  <canvas class="canvas" id="canvas"></canvas>
  <label class="upload" for="file">
    <input
    class="upload-item"
    type="file"
    name="image"
    id="file"
    accept="image/*"
    >
    <span class="upload-text">画像をアップロード</span>
  </label>
  <!-- /.upload -->
</body>アップロードボタンのデフォルトのスタイルがなんか嫌だったので、シンプルなものに変えました。 ポイントはlabelタグを使って<input type="file">タグはdisplay:none;で消しちゃうところです。canvasタグはアップロードボタンの高さを引いて画面いっぱいにします。
html.is-dragging .upload{
  pointer-events: none;
}

body{
  font-family:'Noto Sans JP', MyYuGothicM, YuGothic, 'Helvetica Neue',
  'Hiragino Kaku Gothic ProN', Meiryo, sans-serif;
}

.wraper{
  position: fixed;
  top: 0;
  left: 0;
  z-index: 10;
  width: 100%;
  height: 100%;
  touch-action: none;
  user-select: none;
}

.canvas{
  width: 100%;
  height: calc(100% - 90px);
  touch-action: none;
  user-select: none;
}

.upload{
  position: relative;
  display: -webkit-box;
  display: -webkit-flex;
  display: -ms-flexbox;
  display: flex;
  -webkit-box-align: center;
  -webkit-align-items: center;
  -ms-flex-align: center;
  align-items: center;
  -webkit-box-pack: center;
  -webkit-justify-content: center;
  -ms-flex-pack: center;
  justify-content: center;
  width: 100%;
  height: 90px;
  background: #eee;
  transition: .2s ease;
  cursor: pointer;
  user-select: none;
  -webkit-touch-callout: none;
  -webkit-tap-highlight-color: rgba(0, 0, 0, 0);
}

.upload-item{
  display: none;
}

.upload-text{
  font-size: 18px;
  font-weight: 500;
  user-select: none;
}

.upload:focus{
  color: #fff;
  background: #81cf7a;
}

@media screen and (min-width:768px){
  .upload:hover{
    color: #fff;
    background: #81cf7a;
  }
}ちょっとコードが長めになってしまったので、わかりやすいように分けて説明します。 主な内容はこちら。
この4つに分けて順番に見ていきます。
最後にまとめて全体のソースコードを載せます。
ちなみに今回もES6+でClassを使って書きます。
実際に読み込んでいるJSファイルはgulp + webpack + Babalでビルドしています。
まずは動かすための画像が必要なので、canvasにアップロードした画像を表示させる処理を書きます。
class InteractCanvas {
  constructor(){
    this.file = document.getElementById('file');
    this.createCanvasContext();
    this.bind();
  }

  bind(){
    //ファイルアップロードを検知
    this.file.addEventListener('change', (e) => {
      this.loadImage(e);
    }, false);
  }

  //canvasの描画機能を有効化
  createCanvasContext() {
    this.canvas        = document.getElementById('canvas');
    this.canvas.width  = this.canvas.clientWidth;
    this.canvas.height = this.canvas.clientHeight;
    this.ctx           = this.canvas.getContext('2d');
    //描画済みフラグはオフっておく
    this.isDrawed      = false;
  }

  //画像を読み込む
  loadImage(e) {
    if(!e.target.files[0]){
      return;
    }
    const file = e.target.files[0];

    //画像以外のファイルは無効
    if(!file.type.match("image.*")){
      alert('画像をアップロードしてください');
      return;
    }
    //FileオブジェクトからURLを生成
    const urlObj = window.URL || window.webkitURL;
    const url    = urlObj.createObjectURL(file);
    //canvasに描画
    this.drawCanvas(url);
  }

  /*
  * canvasに描画する
  * @param {String} 画像url
  */
  drawCanvas(url) {
    if(!url){
      return;
    }
    this.img        = new Image();
    this.img.src    = url;
    this.img.onload = () => {
      //画像をcanvasの中心に描画
      this.drawImageCenter();
    }
  }

  //画像をcanvasの中心に描画する
  drawImageCenter(){
    //幅・高さの上限
    const limit = 0.8;
    const maxW  = this.canvas.width * limit;
    const maxH  = this.canvas.height * limit;

    //描画する画像の幅もしくは高さが上限を超える場合
    if(
      this.img.width >= maxW ||
      this.img.height >= maxW
      )
    {
      //高さの上限に合わせる
      this.drawHeight = maxH;
      this.drawWidth  = this.drawHeight * (this.img.width / this.img.height);
      //はみ出す場合は幅の上限に合わせる
      if(this.drawWidth >= maxW){
        this.drawWidth  = maxW;
        this.drawHeight = this.drawWidth * (this.img.height / this.img.width);
      }
    }
    //それ以外はそのままのサイズで表示
    else {
      this.drawWidth  = this.img.width;
      this.drawHeight = this.img.height;
    }

    //位置をcanvasの中心にする
    this.position = {
      x : this.canvas.width / 2 - this.drawWidth / 2,
      y : this.canvas.height / 2 - this.drawHeight / 2
    };

    //canvasをクリア
    this.ctx.clearRect(0, 0, this.canvas.width, this.canvas.height);

    this.ctx.drawImage(
      this.img,
      this.position.x,
      this.position.y,
      this.drawWidth,
      this.drawHeight
      );

    //描画済みフラグをたてる
    this.isDrawed = true;
  }
}
new InteractCanvas();ポイントはdrawImageCenter()関数です。
内容はアップロードされた画像をcanvasの中心に表示させるというものです。
いろいろと計算が条件分岐されていますが、ざっくりと説明するとアップロードされた画像のサイズに応じて、canvasからはみ出さないように描画サイズを変更しています。 ここでは表示されているcanvasサイズの幅・高さそれぞれの80%を上限として計算しています。
それ以外の部分に関してはcanvasの基本的な読み込みと表示の処理なので特に難しい部分はないです。
ここが今回の本題。
canvas上の画像をinteract.jsを使ってドラッグ可能にします。
今回は前回の記事では付けていたスマホでの拡大縮小機能は省きました。
class InteractCanvas {

  // ~~ 省略 ~~

  bind(){
    //ファイルアップロードを検知
    this.file.addEventListener('change', (e) => {
      this.loadImage(e);
    }, false);

    //描画した画像のマウスオン処理
    this.canvas.addEventListener('mousemove', (e) => {
      this.addDraggableCursor(e);
    }, false);
  }

  // ~~ 省略 ~~


  /*
  * canvasに描画する
  * @param {String} 画像url
  */
  drawCanvas(url) {
    if(!url){
      return;
    }
    this.img        = new Image();
    this.img.src    = url;
    this.img.onload = () => {
      //画像をcanvasの中心に描画
      this.drawImageCenter();
      //interact.jsを適用
      this.applyInteractJs();
    }
  }


  //interact.jsを適用
  applyInteractJs(){
    //任意のカーソルのスタイル設定用
    this.cursor   = null;
    //ドラッグイベントの状態によって<html>タグにclassを付与するため要素を変数にして共通化しておく
    this.html     = document.documentElement;
    //ドラッグイベントを適用
    this.addDraggingEvent();
  }

  //ドラッグイベントを適用
  addDraggingEvent(){
    //interact.jsが適用されている場合は削除して再適用
    if(this.interact){
      this.interact.unset();
      this.interact = null;
    }

    this.interact = interact('#canvas')
    .draggable({
      inertia     : true,
      onstart     : (e) => {
        this.dragStartListener(e);
      },
      onmove      : (e) => {
        this.dragMoveListener(e);
      },
      onend       : (e) => {
        this.dragEndListener(e);
      },
      cursorChecker: (action, interactable, element, interacting) => {
        if(this.cursor){
          return this.cursor;
        }
        else {
          return interacting ? 'grabbing' : null;
        }
      }
    });
  }

  /*
  * dragstartイベントを取得
  * @param {Object} e
  */
  dragStartListener(e) {
    this.isDrag = false;
    //canvasに表示した画像の範囲内にポインタがあるかどうかを判定する
    if(
      e.clientX >= this.position.x &&
      e.clientX <= this.position.x + this.drawWidth &&
      e.clientY >= this.position.y &&
      e.clientY <= this.position.y + this.drawHeight
      )
    {
      //ドラッグ中フラグを立てる
      this.isDrag = true;
    }
  }

  /*
  * dragmoveイベントを取得
  * @param {Object} e
  */
  dragMoveListener(e){

    if(!this.isDrag){
      if(this.html.classList.contains('is-dragging')){
        this.html.classList.remove('is-dragging');
      }
      return;
    }
    if(!this.html.classList.contains('is-dragging')){
      this.html.classList.add('is-dragging');
    }

    //位置情報を計算
    this.position.x = this.position.x + e.dx;
    this.position.y = this.position.y + e.dy;

    //canvasをクリア
    this.ctx.clearRect(0, 0, this.canvas.width, this.canvas.height);
    //移動した値で描画
    this.ctx.drawImage(
      this.img,
      this.position.x,
      this.position.y,
      this.drawWidth,
      this.drawHeight
      );
  }

  /*
  * dragendイベントを取得
  * @param {Object} e
  */
  dragEndListener(e){
    if(this.html.classList.contains('is-dragging')){
      this.html.classList.remove('is-dragging');
    }
  }

  /*
  * ドラッグ時のカーソルを調整
  * @param {Object} e マウスオンイベント
  */
  addDraggableCursor(e){
    //すでに描画されている場合のみ
    if(!this.isDrawed){
      return;
    }
    //画像が描画されている範囲ないにマウスポインタがある場合
    if(
      e.clientX >= this.position.x &&
      e.clientX <= this.position.x + this.drawWidth &&
      e.clientY >= this.position.y &&
      e.clientY <= this.position.y + this.drawHeight
      )
    {
      //カーソルを変更
      this.cursor = 'grab';
    }
    else {
      this.cursor = null;
    }
  }

}
new InteractCanvas();基本的には前回の記事と同じく位置情報をメンバ変数に保存しておき、onmoveで位置の更新が行われるたびに位置情報を更新する仕組みを使います。
前回はhtml要素にcssでtransformを設定して動かしていましたが、今回はcanvasのコンテキストを動かします。
cssとの違いはcanvasのclearRectメソッドで描画をクリアし、drawImageメソッドを使って新しい位置に画像を描画するという処理ですかね。 位置情報だけでなく描画する画像のサイズも毎回指定が必要です。
//canvas全体をクリアする
this.ctx.clearRect(0, 0, this.canvas.width, this.canvas.height);

//移動した値で描画
this.ctx.drawImage(
  this.img,
  this.position.x,  //描画する画像のx座標位置
  this.position.y,  //描画する画像のy座標位置
  this.drawWidth,   //描画する画像の幅
  this.drawHeight   //描画する画像の高さ
 );
また、interact.jsは自動的にドラッグする図形を判定してマウスポインタをgrabやdraggingなどに変更してくれますが、canvasに画像を描画した場合はちょっと勝手が変わります。 画像の位置を判定して自分でポインタを変更する処理を追加する必要があります。
/*
* ※説明のために部分的に抜粋しています
*/

//描画した画像のマウスオン処理
this.canvas.addEventListener('mousemove', (e) => {
  this.addDraggableCursor(e);
}, false);

/*
* ドラッグ時のカーソルを調整
* @param {Object} e マウスオンイベント
*/
addDraggableCursor(e){
  //描画済みフラグがある場合のみ
  if(!this.isDrawed){
    return;
  }
  //マウスが画像上にあるかどうか描画位置を計算
  if(
    e.clientX >= this.position.x &&
    e.clientX <= this.position.x + this.drawWidth &&
    e.clientY >= this.position.y &&
    e.clientY <= this.position.y + this.drawHeight
    )
  {
    //画像上にある場合のみ cursor:grab; を適用
    this.cursor = 'grab';
  }
  else {
    this.cursor = null;
  }
}


//interact.jsのオプションでcursorCheckerを使って任意のカーソルに変更する
this.interact = interact('#canvas')
.draggable({
  cursorChecker: (action, interactable, element, interacting) => {
    if(this.cursor){
      return this.cursor;
    }
    else {
      return interacting ? 'grabbing' : null;
    }
  }
});


//dragstartイベントを取得時にcanvas上の画像にマウスポインタがあればフラグを立てる
dragStartListener(e) {
  this.isDrag = false;
  //canvasに表示した画像の範囲内にポインタがあるかどうかを判定する
  if(
    e.clientX >= this.position.x &&
    e.clientX <= this.position.x + this.drawWidth &&
    e.clientY >= this.position.y &&
    e.clientY <= this.position.y + this.drawHeight
    )
  {
    //ドラッグ中フラグを立てる
    this.isDrag = true;
  }
}
この対策をしない場合は描画された画像でなくcanvas全体でマウス位置の判定がされてしまうので、画像にマウスが乗っていないのにカーソルが変わってしまうためちょっと違和感が残ります。
カーソルの変更に関しては公式ドキュメントのこちらを参考にしました。
Draggable | interact.js
https://interactjs.io/docs/draggable#cursorchecker
またドラッグで図形を動かしている最中は他の要素のマウスイベントは発生させたくないので、<html>要素に.is-dragを付与して反応させたくない要素にCSSでpointer-events:none;を指定しておきます。
canvasは自動でレスポンシブにはなりませんので、画面幅が変更された場合は合わせて再描画する必要があります。 interact.jsも再適用します。
/*
* ※説明のために部分的に抜粋しています
*/

//リサイズフラグ
this.resizeFlag  = true;
this.resizeTimer = null


//画面リサイズ
window.addEventListener( 'resize', () => {
  if(this.resizeFlag){
    this.resizeFlag = false;
    if(this.resizeTimer){
      window.cancelAnimationFrame(this.resizeTimer);
    }
    this.resizeTimer = window.requestAnimationFrame(() => {

      //ここにリサイズ時の処理を書く
      this.drawResizeImage();

      this.resizeFlag = true;
    });
  }
}, false );

//リサイズ時に再描画する
drawResizeImage(){
  //すでに描画されている場合のみ
  if(!this.isDrawed){
    return;
  }
  //canvasを再取得
  this.createCanvasContext();
  //再描画
  this.drawImageCenter();
  //interact.js再適用
  this.applyInteractJs();
}
これで画面サイズを変更した時に再描画されるので、はみ出したり崩れたりがリセットされるようになりました。
このままでも動きますが、スマホなどではアップロードした画像が荒くなってしまいます。 canvasは高解像度ディスプレイに自動では対応しないので設定してあげる必要があります。 window.devicePixelRatioで解像度を取得して計算処理に加えていきます。
//canvasの描画機能を有効化
createCanvasContext() {
  this.canvas = document.getElementById('canvas');
  //canvasのサイズに解像度を掛ける
  this.canvas.width  = this.canvas.clientWidth * window.devicePixelRatio;
  this.canvas.height = this.canvas.clientHeight * window.devicePixelRatio;
  this.ctx           = this.canvas.getContext('2d');
  this.isDrawed      = false;
}


/*
* canvas上で画像をフォーカスしているかどうか => 関数にまとめる
* @param {Object} e
*/
isFocusImageOnCanvas(e){
  //取得した位置座標に解像度を掛ける
  const x = e.clientX * window.devicePixelRatio;
  const y = e.clientY * window.devicePixelRatio;

  return (
    x >= this.position.x &&
    x <= this.position.x + this.drawWidth &&
    y >= this.position.y &&
    y <= this.position.y + this.drawHeight
    );
}

/*
* ドラッグ時のカーソルを調整
* @param {Object} e マウスオンイベント
*/
addDraggableCursor(e){
  //すでに描画されている場合のみ
  if(!this.isDrawed){
    return;
  }
  //画像のフォーカス判定
  const isFocusImageOnCanvas = this.isFocusImageOnCanvas(e);
  if(isFocusImageOnCanvas){
    this.cursor = 'grab';
  }
  else {
    this.cursor = null;
  }
}

/*
* dragstartイベントを取得
* @param {Object} e
*/
dragStartListener(e) {
  this.isDrag = false;

    //画像のフォーカス判定
    const isFocusImageOnCanvas = this.isFocusImageOnCanvas(e);
    if(isFocusImageOnCanvas){
      //ドラッグ中フラグを立てる
      this.isDrag = true;
    }
  }

/*
* dragmoveイベントを取得
* @param {Object} e
*/
dragMoveListener(e){

  if(!this.isDrag){
    if(this.html.classList.contains('is-dragging')){
      this.html.classList.remove('is-dragging');
    }
    return;
  }
  if(!this.html.classList.contains('is-dragging')){
    this.html.classList.add('is-dragging');
  }

  //位置情報を計算
  //取得した移動値に解像度を掛けて加算する
  this.position.x = this.position.x + (e.dx * window.devicePixelRatio);
  this.position.y = this.position.y + (e.dy * window.devicePixelRatio);

  //canvasをクリア
  this.ctx.clearRect(0, 0, this.canvas.width, this.canvas.height);
  //移動した値で描画
  this.ctx.drawImage(
    this.img,
    this.position.x,
    this.position.y,
    this.drawWidth,
    this.drawHeight
    );
}
計算処理に加えた内容は以下です。
画像の上にマウスポインタがあるかやドラッグ開始した時に画像をフォーカスしているかどうかの判定をisFocusImageOnCanvas()として真偽値を返す関数に切り分けてコードを整理しました。
これでデバイスの解像度に応じて最適な大きさの画像を描画できるようになりました。
以上の4つのポイントをまとめた最終的なコードがこちらです。
import interact from 'interactjs'

class InteractCanvas {
  constructor(){
    this.file        = document.getElementById('file');

    //リサイズフラグ
    this.resizeFlag  = true;
    this.resizeTimer = null;

    this.createCanvasContext();
    this.bind();
  }

  //イベントはここにまとめる
  bind(){
    //ファイルアップロードを検知
    this.file.addEventListener('change', (e) => {
      this.loadImage(e);
    }, false);

    //描画した画像のマウスオン処理
    this.canvas.addEventListener('mousemove', (e) => {
      this.addDraggableCursor(e);
    }, false);

    //画面リサイズ
    window.addEventListener( 'resize', () => {
      if(this.resizeFlag){
        this.resizeFlag = false;
        if(this.resizeTimer){
          window.cancelAnimationFrame(this.resizeTimer);
        }
        this.resizeTimer = window.requestAnimationFrame(() => {
          //ここにリサイズ時の処理を書く
          this.drawResizeImage();
          this.resizeFlag = true;
        });
      }
    }, false );

  }

  //canvasの描画機能を有効化
  createCanvasContext() {
    this.canvas = document.getElementById('canvas');
    this.canvas.width  = this.canvas.clientWidth * window.devicePixelRatio;
    this.canvas.height = this.canvas.clientHeight * window.devicePixelRatio;
    this.ctx           = this.canvas.getContext('2d');
    this.isDrawed      = false;
  }

  //画像を読み込む
  loadImage(e) {
    if(!e.target.files[0]){
      return;
    }
    const file = e.target.files[0];
    //画像以外のファイルは無効
    if(!file.type.match("image.*")){
      alert('画像をアップロードしてください');
      return;
    }
    //FileオブジェクトからURLを生成
    const urlObj = window.URL || window.webkitURL;
    const url     = urlObj.createObjectURL(file);
    //canvasに描画
    this.drawCanvas(url);
  }

  /*
  * canvasに描画する
  * @param {String} 画像url
  */
  drawCanvas(url) {
    if(!url){
      return;
    }
    this.img        = new Image();
    this.img.src    = url;
    this.img.onload = () => {
      //画像をcanvasの中心に描画
      this.drawImageCenter();
      //interact.jsを適用
      this.applyInteractJs();
    }
  }

  //canvasの中心に描画する
  drawImageCenter(){
    //幅・高さの上限
    const limit = 0.8;
    const maxW  = this.canvas.width * limit;
    const maxH  = this.canvas.height * limit;

    //描画する画像の幅もしくは高さが上限を超える場合
    if(
      this.img.width >= maxW ||
      this.img.height >= maxW
      )
    {
      //高さの上限に合わせる
      this.drawHeight = maxH;
      this.drawWidth  = this.drawHeight * (this.img.width / this.img.height);
      //はみ出す場合は幅の上限に合わせる
      if(this.drawWidth >= maxW){
        this.drawWidth  = maxW;
        this.drawHeight = this.drawWidth * (this.img.height / this.img.width);
      }
    }
    //それ以外はそのままのサイズで表示
    else {
      this.drawWidth  = this.img.width;
      this.drawHeight = this.img.height;
    }

    //位置をcanvasの中心にする
    this.position = {
      x : this.canvas.width / 2 - this.drawWidth / 2,
      y : this.canvas.height / 2 - this.drawHeight / 2
    };

    //canvasをクリア
    this.ctx.clearRect(0, 0, this.canvas.width, this.canvas.height);

    this.ctx.drawImage(
      this.img,
      this.position.x,
      this.position.y,
      this.drawWidth,
      this.drawHeight
      );
    this.isDrawed = true;
  }

  //interact.jsを適用
  applyInteractJs(){
    this.cursor   = null;
    this.html     = document.documentElement;
    this.addDraggingEvent();
  }

  //ドラッグイベントを適用
  addDraggingEvent(){
    if(this.interact){
      this.interact.unset();
      this.interact = null;
    }
    this.interact = interact('#canvas')
    .draggable({
      inertia     : true,
      onstart     : (e) => {
        this.dragStartListener(e);
      },
      onmove      : (e) => {
        this.dragMoveListener(e);
      },
      onend       : (e) => {
        this.dragEndListener(e);
      },
      cursorChecker: (action, interactable, element, interacting) => {
        if(this.cursor){
          return interacting ? 'grabbing' : this.cursor;
        }
        else {
          return interacting ? 'grabbing' : null;
        }
      }
    });
  }

  /*
  * dragstartイベントを取得
  * @param {Object} e
  */
  dragStartListener(e) {
    this.isDrag = false;

    //画像のフォーカス判定
    const isFocusImageOnCanvas = this.isFocusImageOnCanvas(e);
    if(isFocusImageOnCanvas){
      //ドラッグ中フラグを立てる
      this.isDrag = true;
    }
  }

  /*
  * dragmoveイベントを取得
  * @param {Object} e
  */
  dragMoveListener(e){

    if(!this.isDrag){
      if(this.html.classList.contains('is-dragging')){
        this.html.classList.remove('is-dragging');
      }
      return;
    }
    if(!this.html.classList.contains('is-dragging')){
      this.html.classList.add('is-dragging');
    }

    //位置情報を計算
    this.position.x = this.position.x + (e.dx * window.devicePixelRatio);
    this.position.y = this.position.y + (e.dy * window.devicePixelRatio);

    //canvasをクリア
    this.ctx.clearRect(0, 0, this.canvas.width, this.canvas.height);
    //移動した値で描画
    this.ctx.drawImage(
      this.img,
      this.position.x,
      this.position.y,
      this.drawWidth,
      this.drawHeight
      );
  }

  /*
  * dragendイベントを取得
  * @param {Object} e
  */
  dragEndListener(e){
    if(this.html.classList.contains('is-dragging')){
      this.html.classList.remove('is-dragging');
    }
  }

  /*
  * ドラッグ時のカーソルを調整
  * @param {Object} e マウスオンイベント
  */
  addDraggableCursor(e){
    //すでに描画されている場合のみ
    if(!this.isDrawed){
      return;
    }
    //画像のフォーカス判定
    const isFocusImageOnCanvas = this.isFocusImageOnCanvas(e);
    if(isFocusImageOnCanvas){
      this.cursor = 'grab';
    }
    else {
      this.cursor = null;
    }
  }

  //canvas上で画像をフォーカスしているかどうか
  isFocusImageOnCanvas(e){
    const x = e.clientX * window.devicePixelRatio;
    const y = e.clientY * window.devicePixelRatio;

    return (
      x >= this.position.x &&
      x <= this.position.x + this.drawWidth &&
      y >= this.position.y &&
      y <= this.position.y + this.drawHeight
      );
  }

  //リサイズ時に再描画する
  drawResizeImage(){
    //すでに描画されている場合のみ
    if(!this.isDrawed){
      return;
    }
    //canvasを再取得
    this.createCanvasContext();
    //描画
    this.drawImageCenter();
    //interact.js再設定
    this.applyInteractJs();
  }
}
new InteractCanvas();

うまく動くように作れました。 スマホでも動作します。
iOSでは長押しが反応してしまったり何かとタッチ処理の不具合がありそうなので何かしら対策しないといけないですが、今回はとりあえずここまでで。
今回はinteract.jsを使ってcanvas上の画像を動かしてみました。
通常のコーポレートサイトなどのWeb制作で使うことはあまりないので、管理画面のマイページ用のアバター設定とかに使うような簡単なWebアプリの機能を作りたい人向けですね。
この記事のデモが作れれば、画像をアップロード->位置調整->保存といったような簡単な画像加工アプリケーションの初期段階まで作ることができます。 ただ実際にそういったアプリケーションを作るには今回作ったマウスでの位置移動だけでは不十分で、スマホでの位置移動に加え拡大縮小や回転機能を追加したり、画像を保存するためのWeb APIを用意したり、PCとスマホで別々のUIを用意したり、使いやすいボタン配置や画面設計を考えたり・・・いろいろな調整や追加機能が必要です。 そういった他のUIや機能の実装に注力するためにも、スクラッチにこだわらずにinteract.jsを使って今回のように簡単にドラッグ&ドロップ機能を作るのも一つの手かなと思います。
この記事を書くにあたって以下のサイトを参考にさせていただきました。
https://qiita.com/kyrieleison/items/26fcfb3a1d94bc92c596
https://www.tam-tam.co.jp/tipsnote/javascript/post13538.html
https://www.pazru.net/html5/Canvas/130.html
【WordPress】GA4連携の人気記事ランキング機能を自作プラグイン化してみた
![netlify UPDATE BUILD IMAGE [ビルドイメージの更新]](https://notes.sharesl.net/wp-content/uploads/2022/09/netlify-update-build-image-660x440.jpg)
【netlify】ビルドイメージを更新 [ Ubuntu Xenial 16.04 → Ubuntu Focal 20.04 ]
スクリーンショットのAPI「screendot」を使ってみた

DartSassがなかなか辛かったのでGulpを修正してみた
![AudioVisualizer [ howler.js + SVG ]](https://notes.sharesl.net/wp-content/uploads/2021/07/svg-audiovisualizer-660x440.jpg)
【howler.js】ストリーミング音源からオーディオビジュアライザーを作る

Simple GA Ranking[ver2.1.6]が表示されないので調べてみた


![AVIF [ gulpでjpg・pngからAVIF画像を生成 ]](https://notes.sharesl.net/wp-content/uploads/2022/09/avif-660x440.jpg)
![MutationObserverでDOMを監視[PhotoSwipe(v5)+Swiper(v8)連携]](https://notes.sharesl.net/wp-content/uploads/2022/08/mutationobserver-660x440.jpg)